- Update your address, contact details and beneficiaries.
- Make automatic payments.
- Go green and reduce clutter by having documents delivered electronically.
- Check the value of your policies and investments.
- Download statements and tax documents.
If you are the sole owner of your policy, you may add, remove and/or update information to existing beneficiaries on your policy via this website. If you are the sole owner of your policy, have granted transaction authority for your agent or have added a third party with transaction authority, a partial disbursement may be made on your policy via this website.
NOTE: No transactions are allowed on policies that are Jointly Owned. Requests for jointly owned policies must be submitted in writing and signed by all owners.
Helpful Beneficiary Definitions:
- Primary Beneficiary: The person/entity who will receive payments from the annuity upon the death of the owner and/or annuitant.
- Contingent Beneficiary: A contingent beneficiary, or secondary beneficiary, serves as a backup to the primary beneficiaries and will be paid out if there are no surviving primary beneficiaries.
Getting Started:
Follow step-by-step instructions to guide you through this simple process.
Step 1. Log into your account and select your policy.
Step 2. In the Self-Service Transactions tab, click on Non-Financial.


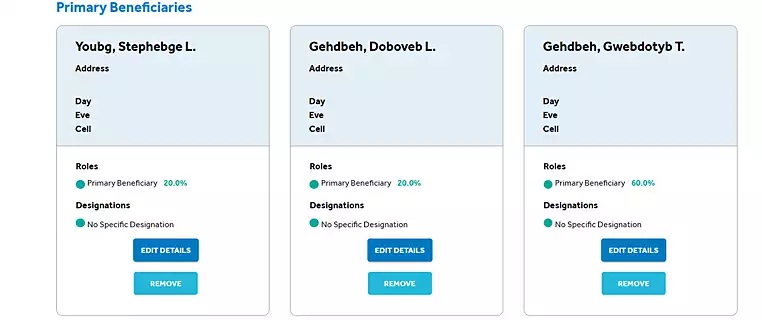
Step 3. Locate the box titled, “Ownership / Beneficiary Change” as pictured below.
Your currently listed policy specific beneficiaries will be listed on the screen.

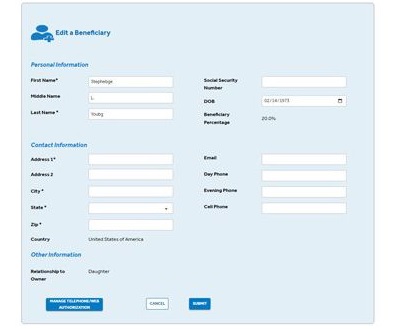
Step 4. For updating Information that we have on file for your listed beneficiaries (i.e., updating address, phone number, email address, tax ID, etc.) find the beneficiary you would like to add information under and click “EDIT DETAILS”.
4(a) Under this screen you may add or update information.
4(b) Once you have updated the fields click “SUBMIT”.
To Add Beneficiaries:
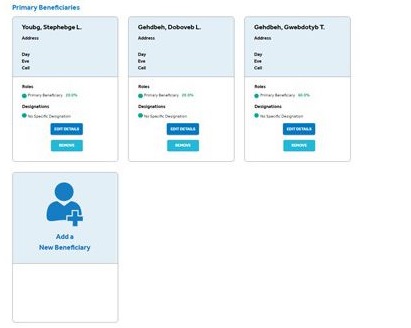
Step 1. Click Add a New Beneficiary.
1(a). Select Primary Beneficiaries or Contingent Beneficiaries (see definitions above for how and when each are paid out).
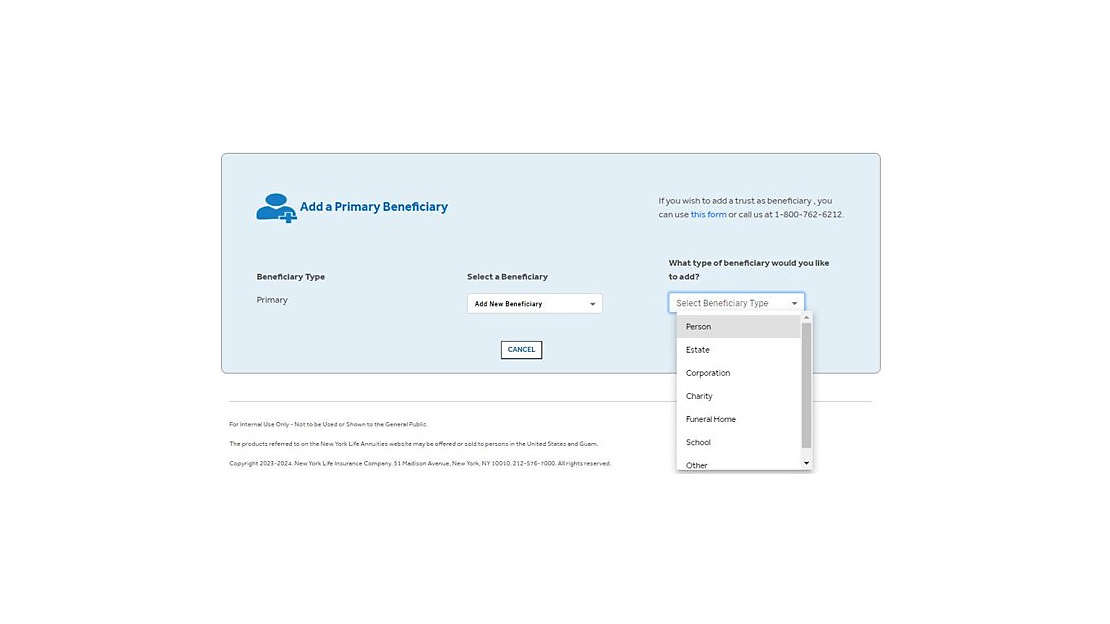
Step 2. Under the drop-down Select a Beneficiary, pictured below, click the option Add a New Beneficiary.
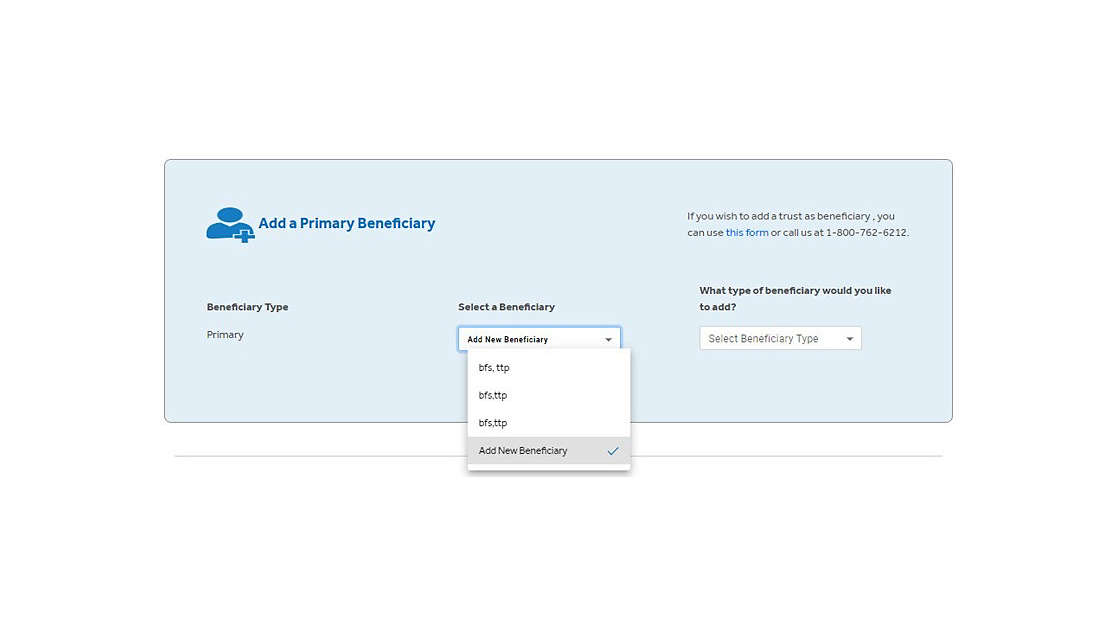
Step 3. Choose “What type of beneficiary would you like to add?” (This can be Person, Estate, Corporation, Charity, Funeral Home, School or Other).
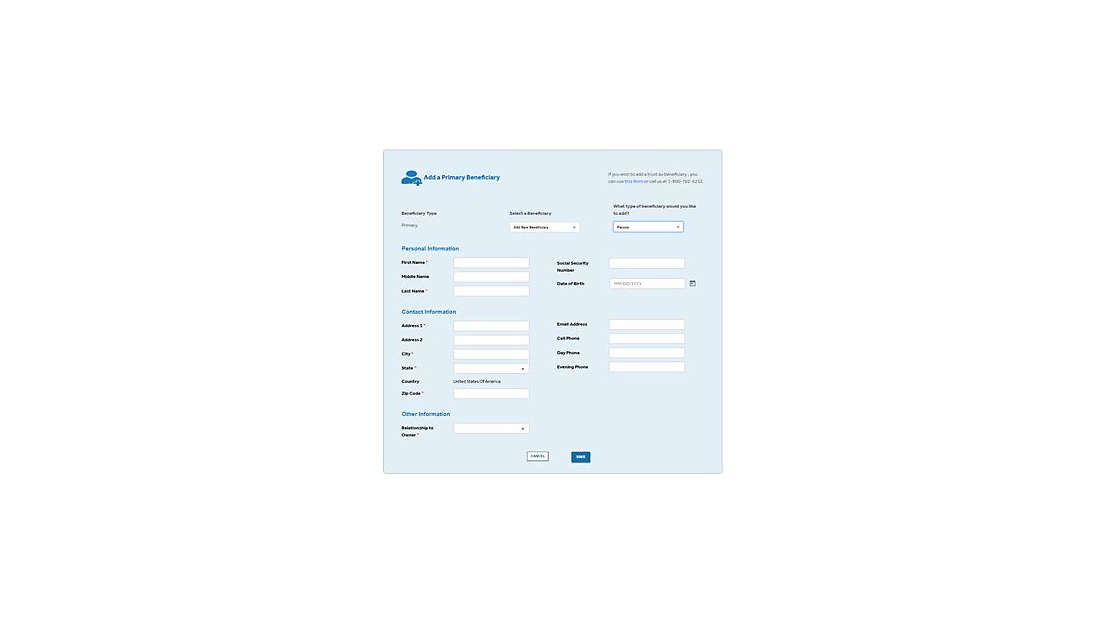
Step 4.· Fill in the appropriate fields for each beneficiary (note, you will be required to provide the address for each beneficiary you add in order to move forward) and then SAVE.
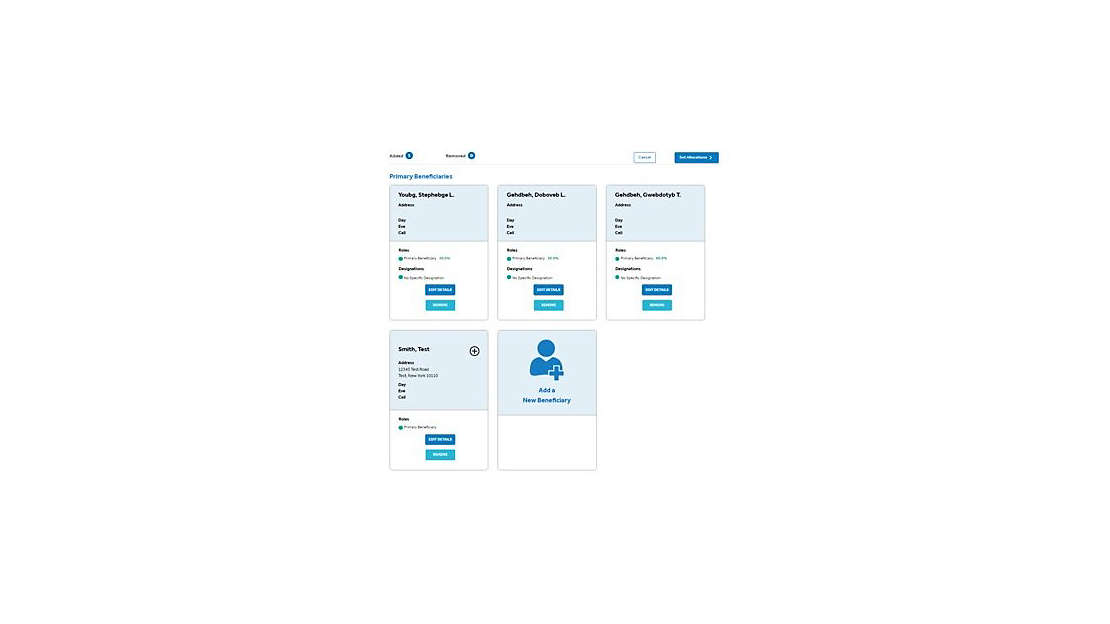
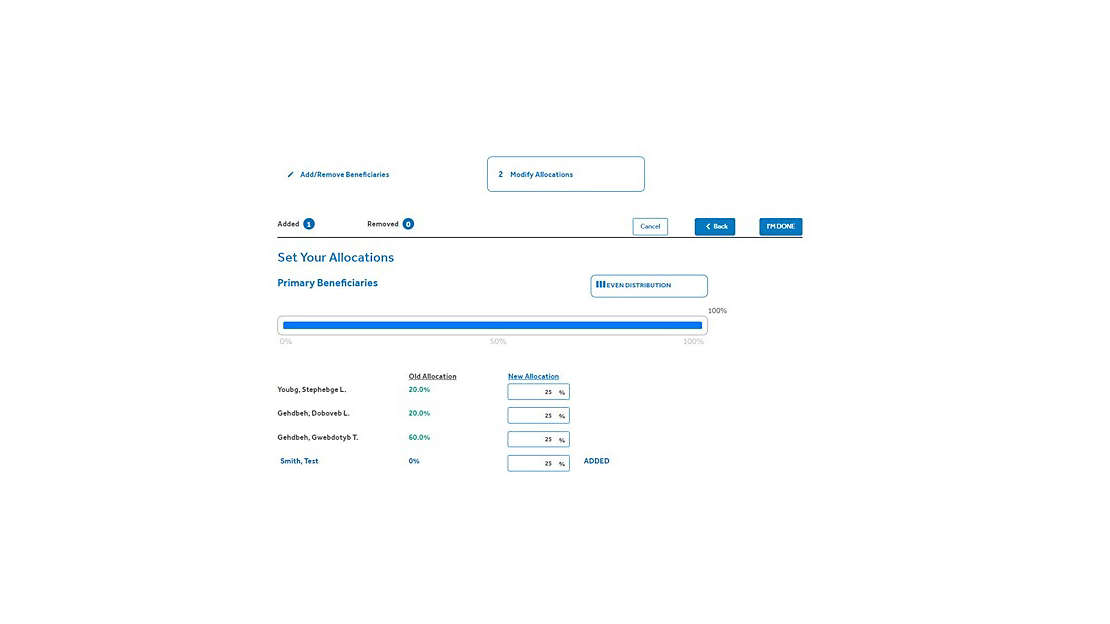
Step 5. Once you’ve added all desired beneficiaries – click the “Set Allocations” Button to update percentages.
NOTE: Totals must add up to 100% for both Primary and Contingent beneficiaries.
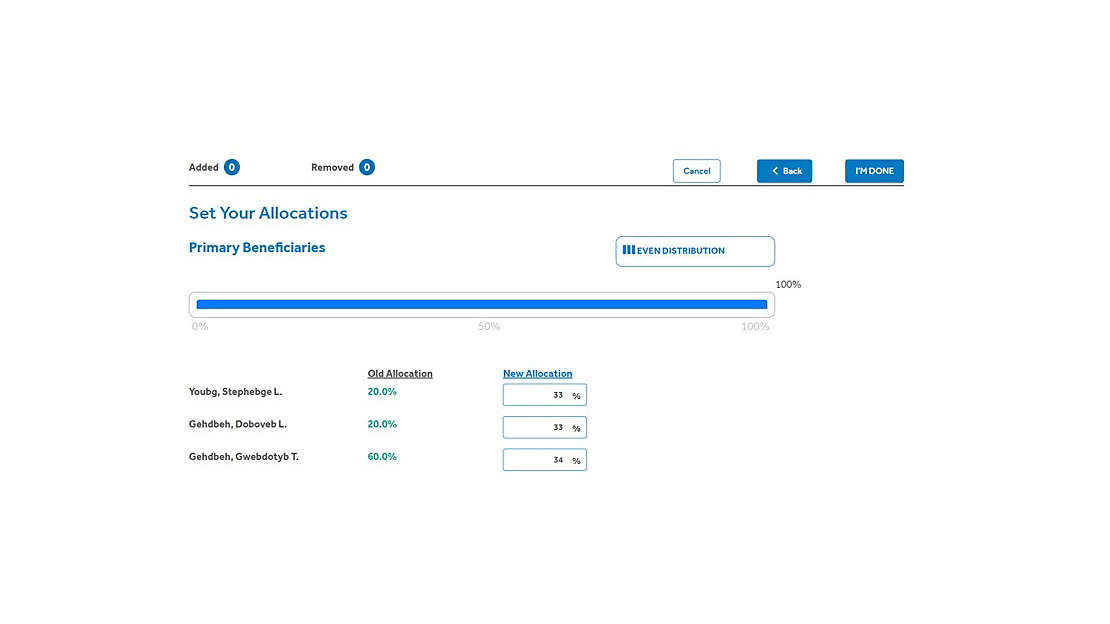
Step 6. On this screen you can select a specific percentage or you can choose “EVEN DISTRIBUTION” to allow the system to designate an even distribution.
NOTE: if the split is an uneven number, for example you have 3 beneficiaries, one beneficiary listed will be designated a slightly higher percentage.
- Scenario: There are 3 named beneficiaries, Beneficiary 1, Beneficiary 2 and Beneficiary 3. An even split would be 34% for Beneficiary 1 and 33% for Beneciary 2 and Beneficiary 3.
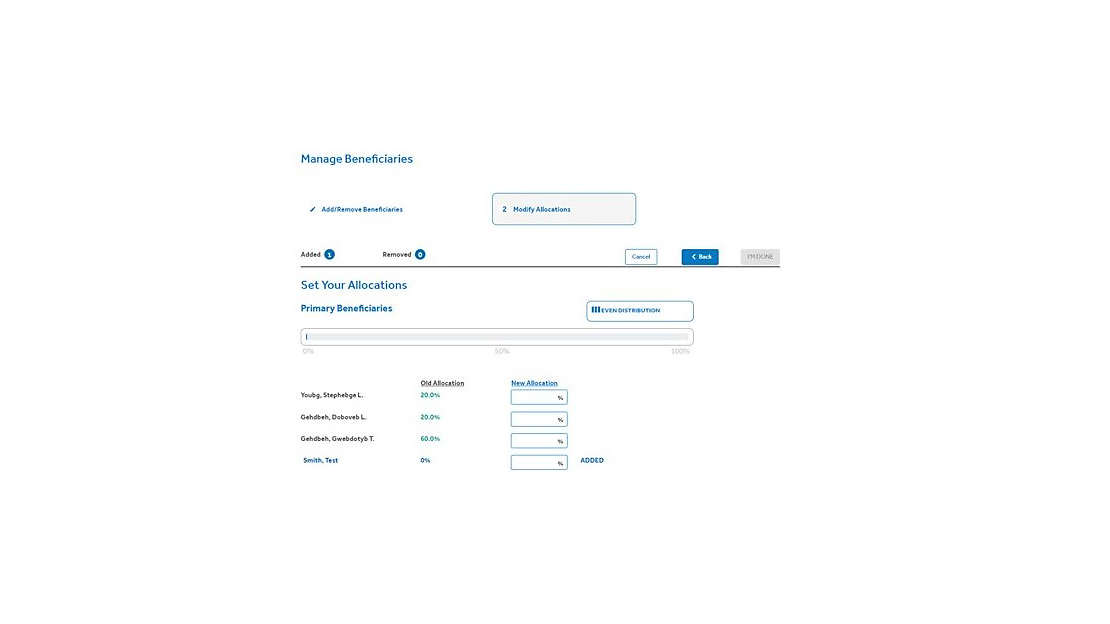
Step 7. Once you have allocations completed, click “I’M DONE”.
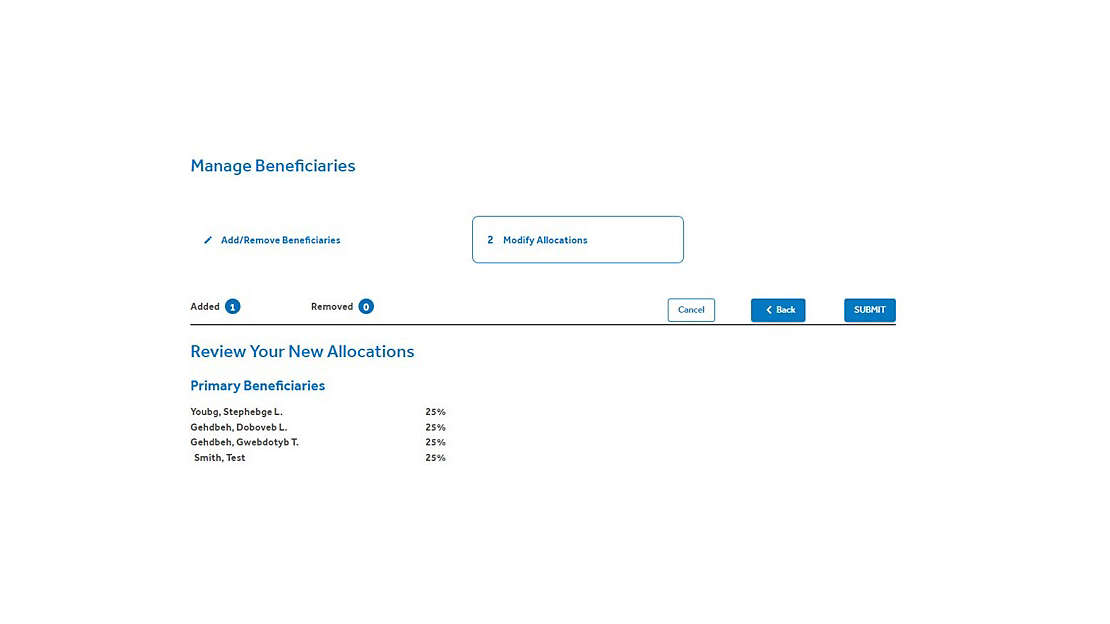
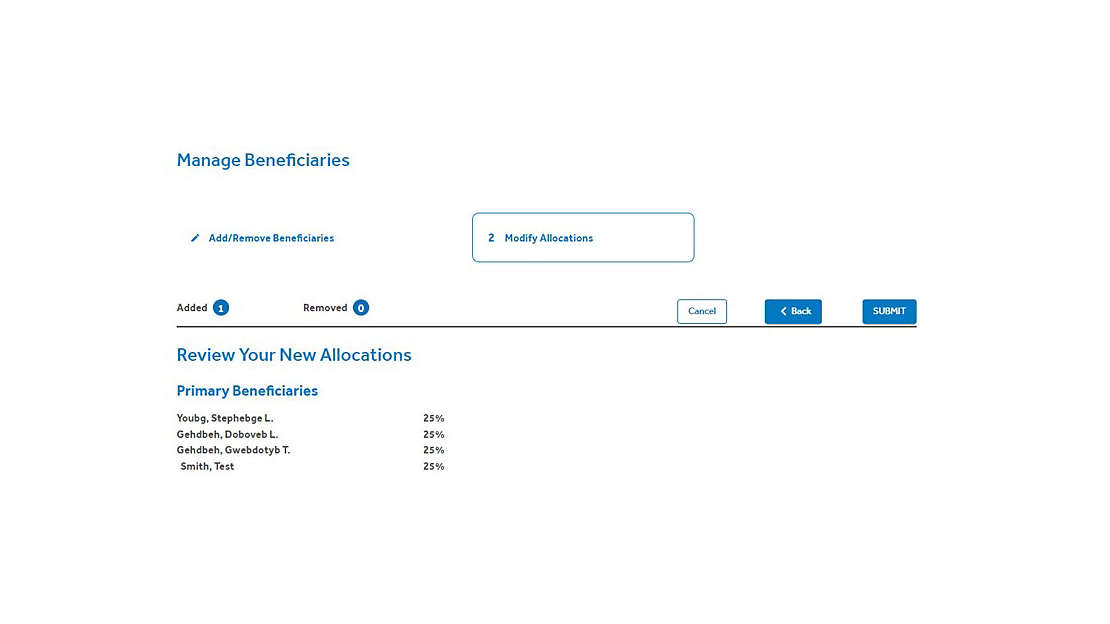
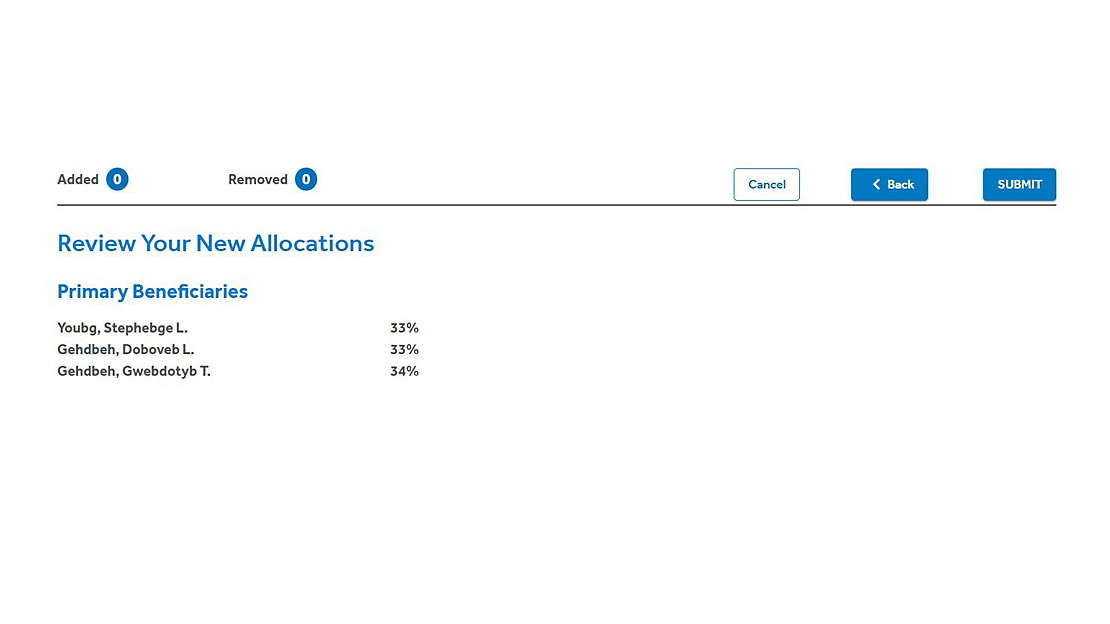
Step 8. Review Your New Allocations: Once you have allocations completed, click “SUBMIT”.
To Remove Beneficiaries:
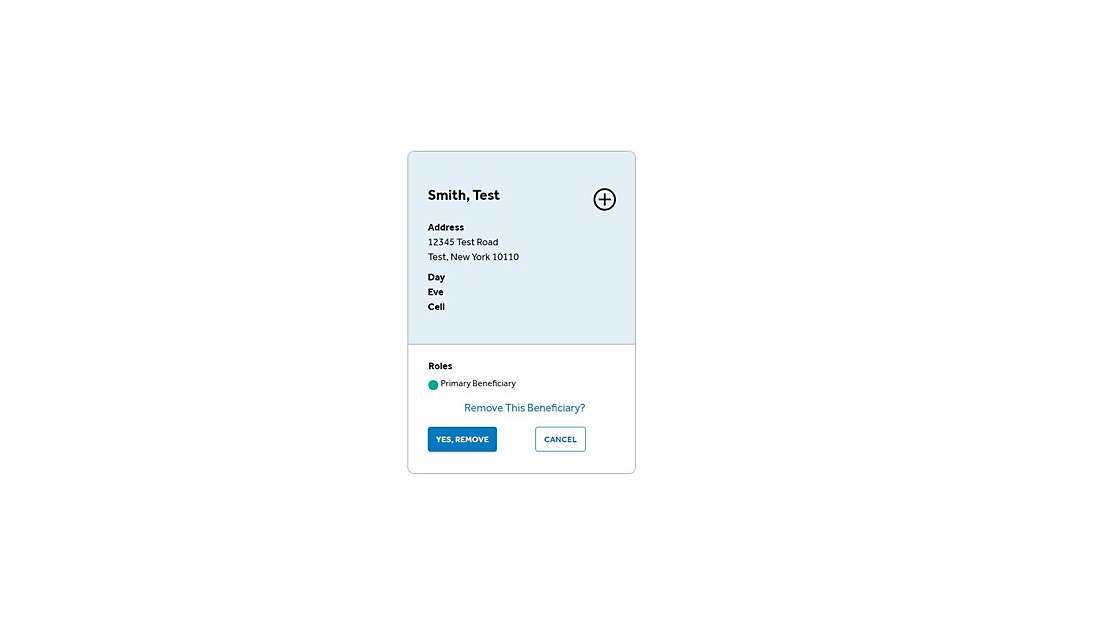
Step 1. Select the listed beneficiary to remove.
1(a). Click the REMOVE button.
Step 1(b). The system will ask “Remove This Beneficiary?” Click YES, REMOVE.
Step 2. The beneficiary will be removed. Now go to “Set Allocations” .
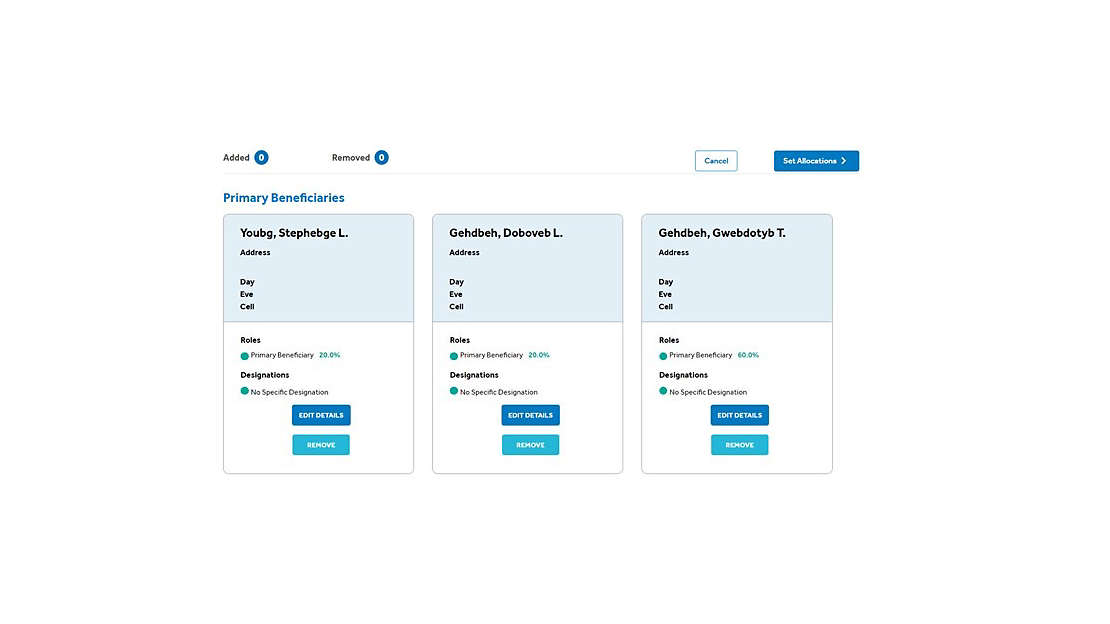
Step 3. Here you can select percentages or choose “EVEN DISTRIBUTION”.
(Sample below is 3 beneficiaries with “EVEN DISTRIBUTION” selected)
- Once you have completed your allocations click the “I’M DONE” button.
- Click “SUBMIT” to save your changes.
Step 4. If all the information, looks correct, click “SUBMIT” .
Step 5. You will receive a summary of your changes with a confirmation number.

Not Registered Yet?
Registering for an online account is simple, saves time, and provides access to all of your account information in one place.
If you have questions about creating an account, please contact our Service Center.
